Hello Android developers! 👋 Today, we’ll dive into one of the newer features in Jetpack Compose: LazyVerticalGrid. If you’re building modern Android apps, you’ll love how this feature makes it super easy to display content in a grid layout. We’ll not only explore what LazyVerticalGrid is but also break down how to use it effectively with code examples in Kotlin. Let’s jump in!
What is LazyVerticalGrid?
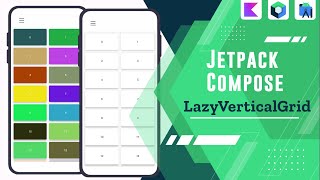
LazyVerticalGrid is a powerful tool introduced in Jetpack Compose that simplifies creating grid layouts. Whether you’re displaying dynamic data sets or static content, this feature is perfect for rendering content in a flexible, scrollable grid. It’s particularly useful for apps with image galleries, product lists, or any content that looks best in a grid format.
Why “Lazy”? The term “lazy” refers to the fact that LazyVerticalGrid only renders the items that are visible on the screen, improving performance by loading content on demand as users scroll through the grid.
Setting Up LazyVerticalGrid
To get started with LazyVerticalGrid, you’ll need to make sure that your project includes the correct Jetpack Compose dependencies. First, add the necessary Compose libraries to your build.gradle file:
dependencies {
    implementation "androidx.compose.foundation:foundation:1.3.0-alpha02"
}
Now, you’re all set to start building your grid layout! Let’s walk through a basic example of using LazyVerticalGrid to display a list of items in a two-column grid.
Example: Simple LazyVerticalGrid Layout
In this example, we’ll create a two-column grid displaying 50 items. Each item will be a card with a simple text label. Check out the code:
import androidx.compose.foundation.ExperimentalFoundationApi
import androidx.compose.foundation.layout.*
import androidx.compose.foundation.lazy.grid.GridCells
import androidx.compose.foundation.lazy.grid.LazyVerticalGrid
import androidx.compose.material3.*
import androidx.compose.runtime.Composable
import androidx.compose.ui.Modifier
import androidx.compose.ui.unit.dp

@OptIn(ExperimentalFoundationApi::class)
@Composable
fun SimpleGrid() {
    // LazyVerticalGrid component to create the grid layout
    LazyVerticalGrid(
        columns = GridCells.Fixed(2),  // Create a fixed 2-column grid
        contentPadding = PaddingValues(16.dp),  // Add padding around the grid
        modifier = Modifier.fillMaxSize()  // Ensure the grid fills the entire available space
    ) {
        items(50) { index ->  // Define 50 items to be displayed
            GridItem(index)  // For each item, display a card with text
        }
    }
}

@Composable
fun GridItem(index: Int) {
    // Define a simple card for each grid item
    Card(
        modifier = Modifier
            .padding(8.dp)  // Add padding around each card
            .fillMaxWidth(),  // Make each card take up the full width of the column
        elevation = 4.dp  // Add elevation to create a shadow effect
    ) {
        // Display text inside each card
        Text(
            text = "Item #$index",  // Dynamic item label
            modifier = Modifier.padding(16.dp)  // Add padding around the text
        )
    }
}
This code creates a simple two-column grid layout that displays 50 items. Each item is represented by a Card that includes a dynamically generated label (e.g., “Item #1”). The grid scrolls vertically and only loads visible items, making it efficient even for large data sets.
More Features of LazyVerticalGrid
Now that we’ve covered the basics, let’s dive into some of the more advanced features of LazyVerticalGrid that can help you create more dynamic and flexible layouts.
Dynamic Column Count
What if you want the number of columns to adjust dynamically based on the screen size? That’s where GridCells.Adaptive comes in. This feature allows you to specify the minimum width of each grid cell, and Compose will automatically adjust the number of columns based on the available space.
@OptIn(ExperimentalFoundationApi::class)
@Composable
fun AdaptiveGrid() {
    // Dynamic grid layout where columns adapt to available space
    LazyVerticalGrid(
        columns = GridCells.Adaptive(128.dp),  // Each grid cell will have a minimum width of 128dp
        contentPadding = PaddingValues(16.dp),  // Add padding around the grid
        modifier = Modifier.fillMaxSize()  // Fill the available space
    ) {
        items(50) { index ->  // Display 50 items
            GridItem(index)  // Reuse the GridItem composable
        }
    }
}
In this example, each grid cell will be at least 128dp wide. As the screen size changes, the number of columns will adjust automatically. This is great for making your layout responsive across different device sizes.
Adding Animations to LazyVerticalGrid
With Compose, you can easily add animations to your grid layout. For instance, you can make certain items in your grid appear or disappear dynamically using AnimatedVisibility. Here’s an example where every other item in the grid is animated:
import androidx.compose.animation.AnimatedVisibility

@OptIn(ExperimentalFoundationApi::class)
@Composable
fun AnimatedGrid() {
    LazyVerticalGrid(
        columns = GridCells.Fixed(2),  // Create a 2-column grid
        contentPadding = PaddingValues(16.dp),  // Add padding around the grid
        modifier = Modifier.fillMaxSize()  // Fill the available space
    ) {
        items(50) { index ->  // Display 50 items
            // Animate visibility for every other item
            AnimatedVisibility(visible = index % 2 == 0) {
                GridItem(index)  // Display the item if it's visible
            }
        }
    }
}
This code uses AnimatedVisibility to control whether an item is visible in the grid. In this case, only every other item is shown. You can customize the animation further by adding fade-ins, slide-ins, or other effects.

Conclusion: Level Up Your Compose UI with LazyVerticalGrid
Jetpack Compose’s LazyVerticalGrid feature makes it incredibly easy to create flexible, scrollable grid layouts in Android apps. Whether you’re displaying a list of products, photos, or articles, this feature allows you to build high-performance grids with minimal effort.
We covered the basics, like creating a simple grid, to more advanced features like adaptive column counts and animations. With these tools, you can enhance your app’s UI and create a richer, more dynamic user experience. Happy coding, and may your grids always be perfectly aligned! 🎉
Source: Jetpack Compose Lazy Lists and Grids
Did you like this article?
You can subscribe to my newsletter below and get updates about my new articles.